Making Gotgam at Home
Air Dried Persimmons With Jihyun Kim
Persimmon. It’s my new favourite fruit. And for so much more than just eating. Belonging to the genus Diospyros, translating roughly as “food of the gods.” Which might sound a little grandiose, but anyone who’s eaten a perfectly ripe astringent persimmon will totally understand why.
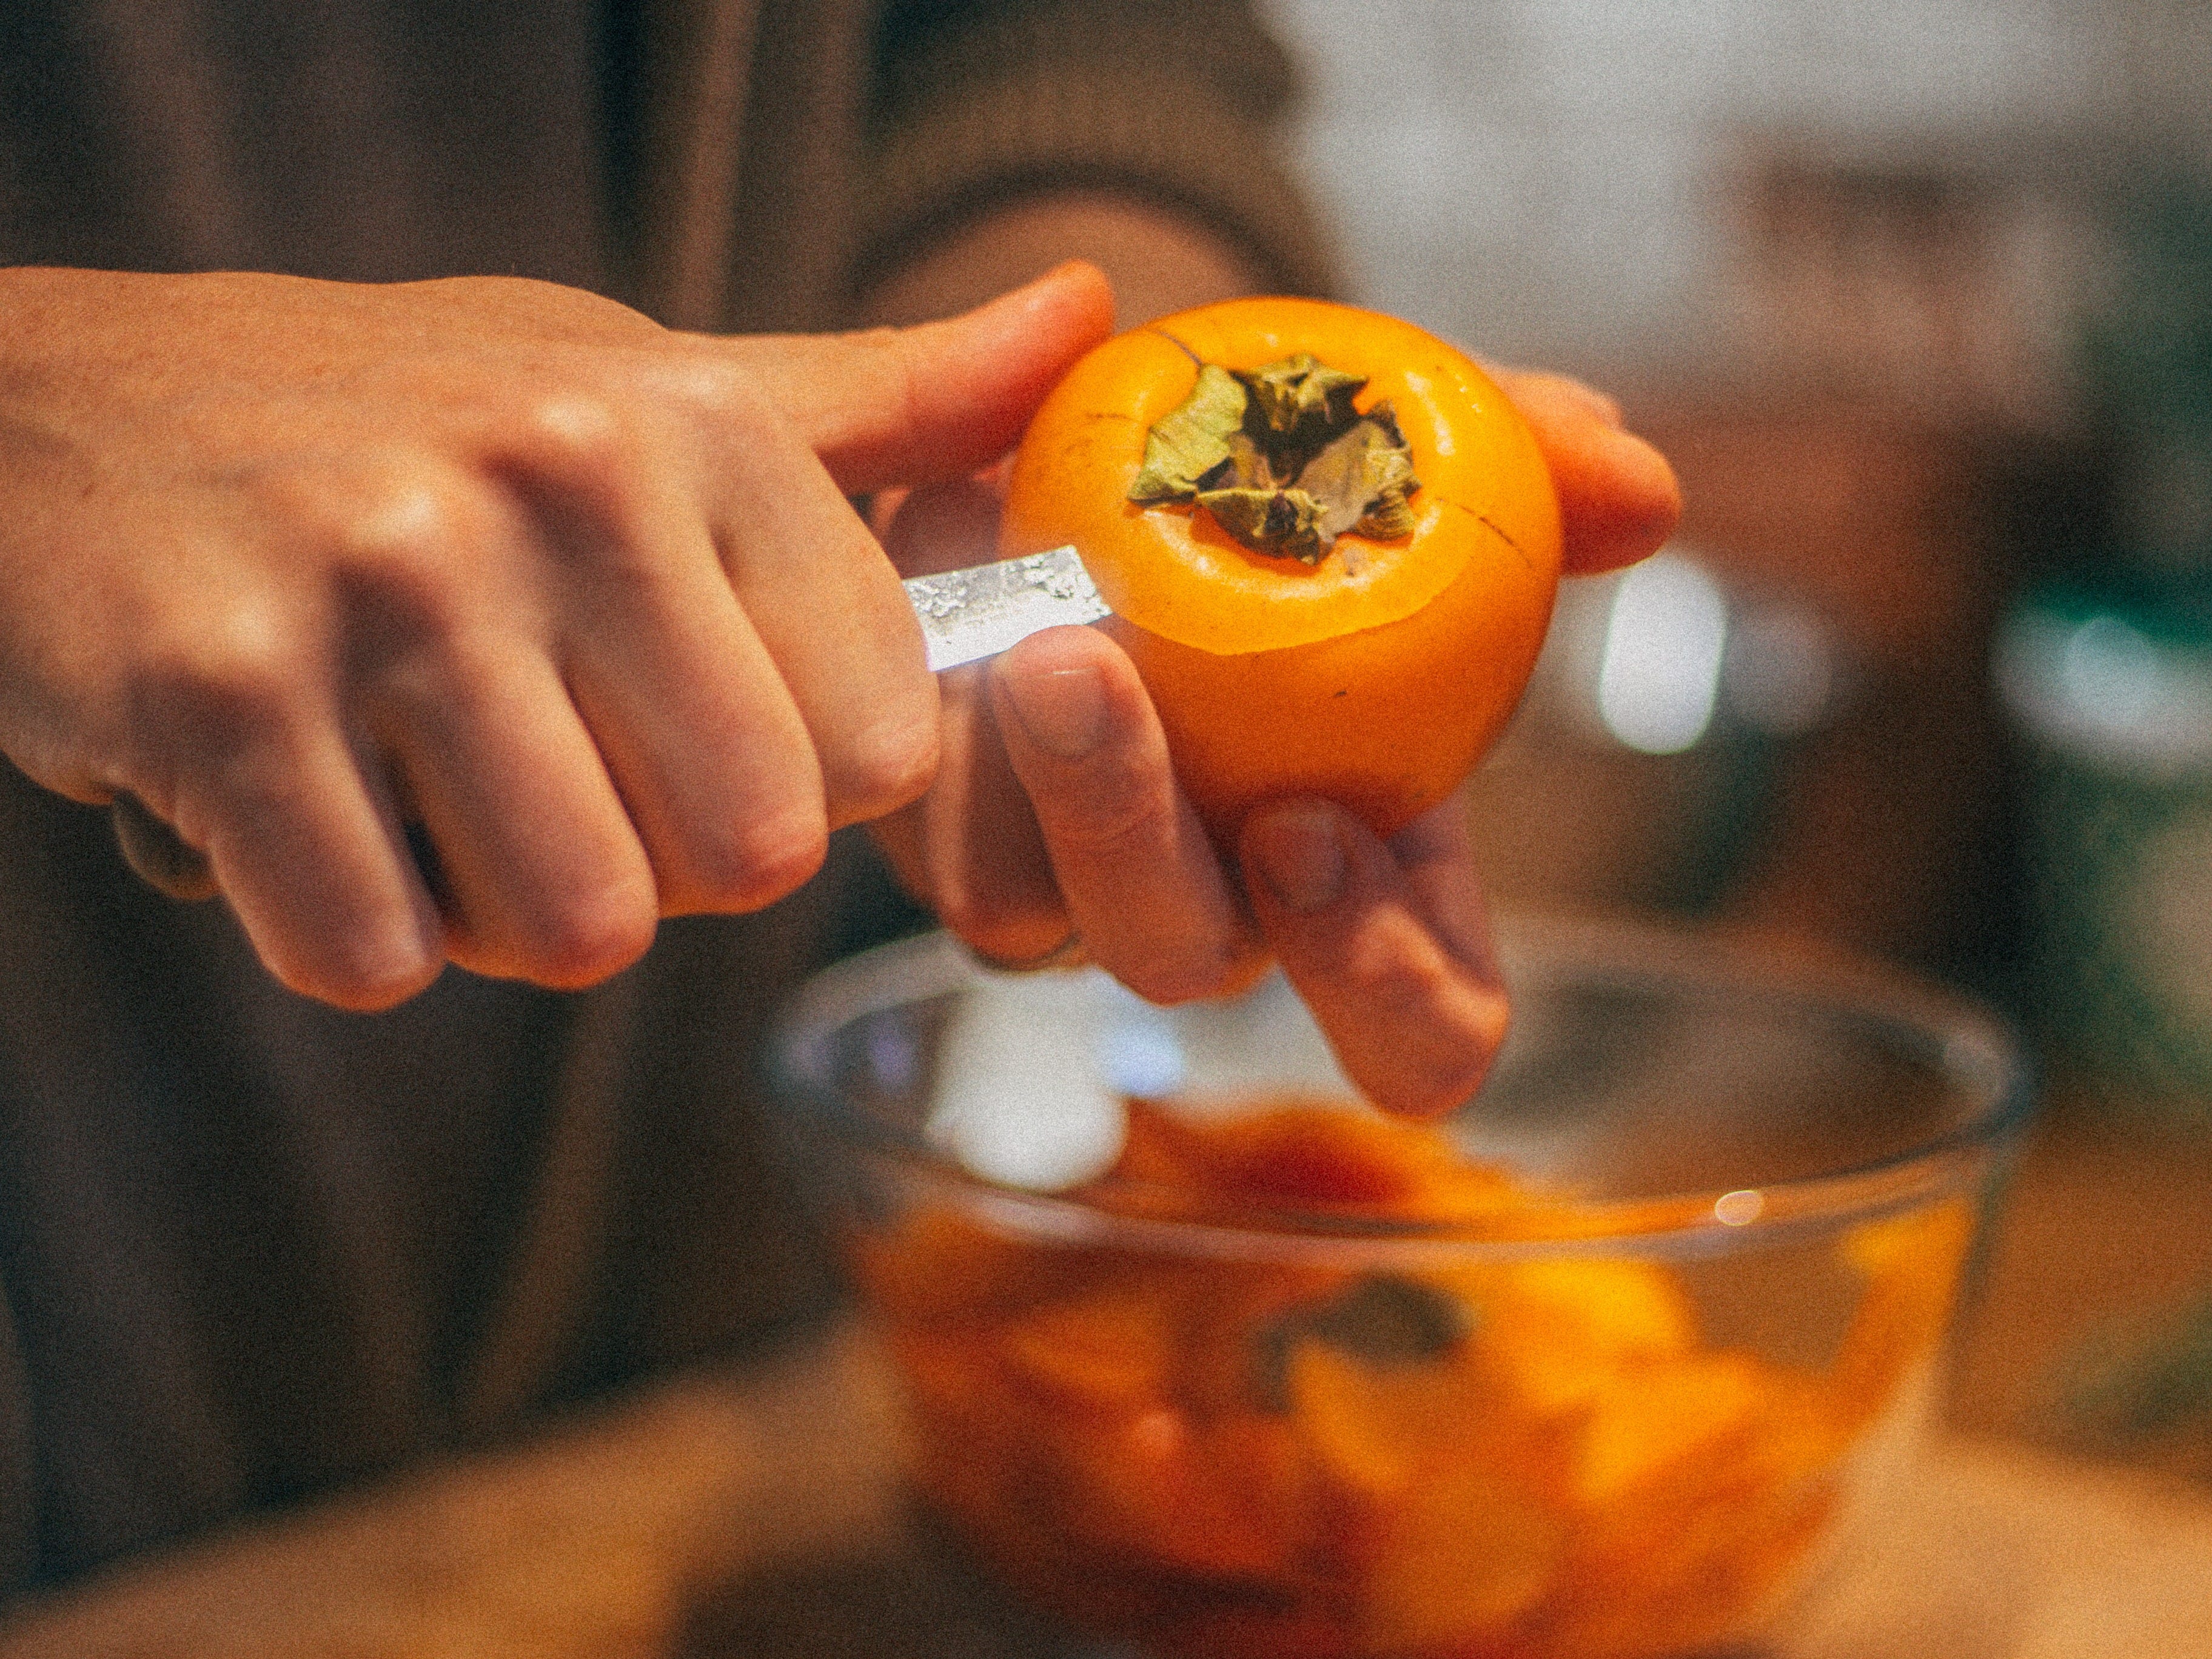
Bright orange, they hang in trees like lanterns during winter, clinging to the bare branches when all else falls, their skin tightening in the grip of frost. During late autumn and winter, they’re a delightful balance of sweet and astringent with a texture that moves from firm melon to something soft and jelly-like.
The trees themselves are surprisingly tough, and both Llyr and I are attempting to grow them in Wales. Persimmon wood is dense and hard, and some species were historically used for tool handles and furniture. In Japan, persimmon tannins (kakishibu) were extracted and used as a natural waterproofing and wood preservative for paper, cloth, and fishing nets. How cool is that?
Persimmon leaves are also edible. In Japan and Korea they’ve been used for tea and food wrapping, valued for their antioxidant content and subtle bitterness such as Kakinoha-zushi, sushi wrapped in persimmon leaves.
Last year I shared chef Chae’s technique for making persimmon vinegar which you can read here
This year I want to share something just as special, how to make Gotgom, Korean air dried persimmon, in collaboration with Jihyun Kim. Also known as Kimmy, founder and owner of Kimchi & Radish, who saw I was attempting to adapt the technique to a humid British climate and reached out to help. She has shared with us the technique her grandmother taught her back in South Korea, which is something very special.
So, without further ado, please join me in this beautifully simple technique.
The Gotgam Technique (Adapted for Britain)
1. Source & Prepare
In selecting persimmons, be sure to find varieties that are astringent. Those that are just sweet won’t work for this technique. The gold standard in Korea is Daebong (대봉), Hachiya (Japan), Saijo (particularly prized for its sugars once dried), Tonewase, and Hiratanenashi. In the UK and Europe we more commonly encounter Rojo Brillante, which works very well as long as it hasn’t been treated to remove its astringency.
Varieties that won’t work are: Fuyu, Jiro, Sharon fruit, or anything marketed as “ready to eat when firm.”
Peel each persimmon completely, working from top to bottom. Take care to leave the calyx and stem intact, as this is essential for hanging.
I also saved all the peelings to mix with an equal amount of sugar to make persimmon cheong. If you’d like the full recipe for this and how I use it, let me know in the comments and I’ll share it next week!
2. Light Sanitising
In Korea, the fruit is often wiped or lightly rinsed with soju to discourage mould in the early days. I used a Welsh gin, but you can use any neutral spirit (unflavoured) with an ABV of 40% or above.
I combined two approaches:
A very brief 2–3 second dip in boiling water (a step also used in Japan). Lay each persimmon on a clean tea towel after scalding them to allow them to dry whilst you dip the next.
Follow this step with a gentle wipe with gin (or soju/vodka) once the fruits are dry. You’ll notice the skinless persimmons have gone from being very slippy to a firmer, dryer texture post-scalding and readily absorb the alcohol offered to them.
These steps tip the balance in your favour during the first week when the fruit is most vulnerable to spoiling.
3. Stringing the Persimmons
Tie strong cotton string securely beneath the stem. In Korea, persimmons are often hung in pairs, depending on space. You can do this step first before scalding but I’d advise making sure the string is both very secure and not dyed.
Once tied up, hang over a pole or an old clothes horse.
In Korea, Kimmy and her grandma would use dedicated stands that help keep the fruits the right distance apart for good air flow. They’re also much quicker to assemble than tying each fruit, so if you find the process enjoyable, perhaps it’s worth the investment for future years.


The important thing to remember is airflow: nothing touching, nothing crowded.
4. Hanging Location
Traditionally, gotgam hangs outdoors under eaves, protected from rain but exposed to cold, moving air. That translates to somewhere cold (roughly 5–12°C), sheltered from rain, well ventilated, and bright but not sunbaked
Mine are hanging in a cold indoor space with a small fan set on low. The window is open slightly (unless it’s raining heavily, which increases humidity) and they’re hanging out near the window but not in direct sunlight. You don’t need to blast them with cold air, just keep the air moving. Dampness thrives on stillness, so keeping a fan going on low effectively turns your room into a gentle walk-in dehydrator.
5. The First Week: Skin Formation
For the first 7–10 days, leave the fruit alone. The surface should go from glossy to matte, then lightly leathery and translucent. If you shine a light behind one, you will be able to see it shine clean through.
Check daily. If any fuzzy mould appears early, wipe gently with alcohol and improve airflow / lower the room temperature.
Darker engrained patches are normal, these are tannins and sugars reacting with oxygen. Their puckering astringency comes from these tannins, which are soluble in fresh persimmons but polymerise during the drying process. They link together into larger molecular chains which, once they reach a certain size, can no longer dissolve in water (or saliva). At that point they’re considered insoluble, and thus we stop tasting them.
6. Gentle Softening
After one or two weeks, once the skin has firmed, gently massage the fruit every few days. Give each one a gentle squeeze. Gotgam isn’t always worked as intensively as hoshigaki, but some handling helps the interior dry evenly and prevents hollow pockets. This promotes a delicious jelly-like interior texture in the finished product.
7. Long, Cold Drying
In Korea, gotgam can take 4–8 weeks, sometimes longer depending on region and weather. During this time their surface will turn gradually white in patches with a sugary bloom. If you aren’t sure if it’s sugars or mould, touch it (with clean hands) it should feel hard and not fuzzy.
In Britain, assume the longer end of that range.
8. When They’re Ready
Finished gotgam should feel light and pliable, be firm on the outside, and dense and jellied inside. Their outside is covered in a natural white sugar bloom, and they smell deep, sweet, and honeyed.
They can be eaten as they are, sliced into dishes, or stored cool for months. Kimmy’s go-to snack is thinly sliced gotgam with cream cheese and walnuts. She also enjoys them with warm ginger tea, or mixed into yoghurt as a snack with fruit and nuts.
Gotgam is a mark of winter. They’re offered during ancestral rites, used in traditional desserts, and often given as gifts around Christmas and Lunar New Year, wrapped carefully and shared as something precious and seasonal.
I would like to take this opportunity to tell you that Kimmy has not only started her own Substack, which you can subscribe to here, but also another special announcement…
Her first book.
Suitably titled KIMCHI, it is a fantastic guide to fermenting and cooking with kimchi, written by someone who not only grew up making it, but also has a wildly successful business selling real, raw kimchi, and a background in cheffing, having trained at Le Cordon Bleu.
Great for all levels and full of kimchis you’ll likely not have come across before outside of Korea. If you enjoyed the kimchi recipes in my book, The Fermentation Kitchen, then you’ve already experienced Kimmy’s work, as she was my helpful guide and consultant in writing those techniques.
If you’d like to support her work, please find the preorder link here. And if you can’t wait, why not try a jar of her kimchi from her online store. She blends traditional flavours with British ingredients, often foraged (such as burdock and wild garlic).
Thank you for reading and supporting the Black Butter Club. If you enjoyed this article, please share it with your friends whilst persimmons are in season and at their best! Check out the Recipe Index here for a full list of all the articles on The Black Butter Club, and remember to check out Kimmy’s substack too.


Sam and Kimmy, this gotgam looks amazing! Thanks for sharing all of these gorgeous photos and techniques. And I'd love to see your recipe for persimmon cheong if you post it. This is fabulous!
These look beautiful, so decorative. I continue to be amazed too by the different ways we can treat and preserve food so it’s still edible, in an age where the concept of fridge-freezers predominates.