

Making Hazelnut Blue & White Rind "Cheeses"
How To Culture, Bloom, & Age Hazelnuts | Free Masterclass (part 2)

Hi,
Welcome back to The Black Butter Club. This week we’re moving into part two of fermented nut “cheeses”, following on from last week’s piece on making the base ferment (you can catch up on that here if you missed it). This next stage is about shaping the paste, growing white or blue mould rinds, and ageing the nuts into soft, spreadable, mature ferments that smell and taste like toasted hazelnuts crossed with potent, properly grown cultures.
That said, I want to stress again – these aren’t cheese replacements. They’re foods in their own right. They don’t behave like dairy cheese in fermentation or cooking, and they taste distinctly of nuts. Think of them instead as a funky nut ferment that happens to use similar cultures and techniques.
In the first article, we covered what’s actually happening inside the ferment – how the enzymes and microbes in miso culture blanched, blended nuts, and which nuts work well for this kind of process and which ones don’t. This time I’ll walk through the equipment I use, where I source cultures, and the full process for shaping, ageing, and ripening both bloomy and blue hazelnut ferments.
Without further ado, let’s crack on.
Equipment
Below is a list of the ideal equipment needed for this technique. I’ve also included links to anything slightly more niche, but feel free to look around and find something the works for you. None of the links of affiliated with me in any way and I’ve shared them just to give you an idea of what I’m talking about.
Fridge (preferably a wine fridge with wooden shelves, or at least a space shelf in a regular fridge).
Blender or food processor
Mixing bowls and spatula
Scales and thermometer
Cheesecloth and draining rack
Aging box and ripening mat / bamboo mat
Basic sanitising kit
Base Fermented Hazelnut Paste (Recap)
(makes approximately 550–580 g fermented nut paste)
Ingredients
400 g raw hazelnuts, preferably fresh and unroasted
60 g mineral water
110 g raw, unpasteurised miso
(rice, barley, or mixed-bean miso at ~10% salt)12.5 g fine sea salt (+ extra for the rind)
Base Fermented Hazelnut Paste (Recap)
Begin by lightly toasting the hazelnuts, just until fragrant, then soak them overnight to fully hydrate. Blanch and remove the skins, drain well, and blend while still slightly warm, adding only as much water as needed to form a thick, cohesive paste. This stage matters: once hazelnuts fully emulsify with excess water, structure and ageing potential are lost.
Allow the paste to cool completely, then mix in raw, unpasteurised miso at around 25–30% of the paste weight. Adjust the final salt level to 3.5–4.5% total salinity, accounting for the salt already present in the miso. The paste should taste savoury and rounded, strongly hazelnut, with clear salt structure but no harshness / bitterness.
In the previous recipe, we then packed it firmly into a jar or bowl, pressing out all air pockets, smoothing the surface, which was salt lightly, and protected it with parchment and a loose cover. This creates a stable, anaerobic environment for fermentation to establish. At this stage, the paste can be used as a finished ferment in its own right.
What follows is the same paste, cultured, shaped, and ripened into bloomy and blue-style hazelnut cheeses.
Bloomed Hazelnut Cheeses
(Camembert-style & Blue-style cultured nut cheeses)
(based on the base fermented hazelnut paste recipe above)
Cultures (per batch of ~550–580 g paste)
Mesophilic starter culture: ~1/16 tsp
Choose one depending on the style you’re making:
Bloomy rind (camembert-style):
Penicillium camemberti — ~1/16 tsp (≈ 0.1–0.15 g) per 550–580 g paste
Blue mould (roquefort-style):
Penicillium roqueforti — ~1/32 tsp (≈ 0.05–0.08 g) per 550–580 g paste
The miso provides the base fermentation ecology; the mould cultures shape the rind and internal ripening.
Method
1. Inoculate the paste
Once the base hazelnut paste has fully cooled, mix in the mesophilic starter culture, followed by your chosen mould culture. The mesophilic bacteria begin the slow process of acidification, which stabilises the paste and creates the conditions the mould needs to develop cleanly later on. The mould culture establishes itself throughout the paste rather than only on the surface, which leads to more even growth during ripening. Stir thoroughly, distributing the cultures evenly without introducing unnecessary air. At this stage the paste should remain thick, cohesive, and structured.
2. Warm activation phase
Cover the paste loosely and leave it at room temperature for 3–6 hours. This short warm period allows the bacteria to wake up and begin working before the paste is shaped and chilled. The aim is metabolic activation rather than visible fermentation. Acidification begins, microbial balance stabilises, and the paste becomes biologically active without losing structure. This step improves flavour development and rind behaviour later in ageing, especially in nut cheeses where microbial chemistry plays a larger role than protein structure (as is the case in dairy).
3. Moulding and pressing
Line cheese moulds with cheesecloth and pack in the cultured paste firmly, pressing as you go to remove air pockets and create a coherent internal structure. Nut cheeses do not self-bind like dairy cheeses, so this physical compaction replaces the role of milk proteins in forming structure. Smooth the surface, fold the cloth over, and gently compress to form clean shapes. Transfer the filled moulds to a lined tray.
4. Cold-setting
Place the moulds in the fridge overnight. This stage allows the hazelnut fats to firm and the emulsion to stabilise, giving the cheeses enough integrity to be handled without collapse. This replaces traditional pressing in dairy cheesemaking; structure here comes from fat-setting rather than whey drainage. If making your cheeses with cashews, you may notice a small amount of runoff from water at this stage, but hazelnuts likely won’t.
5. Demoulding and surface salting
The next day, carefully remove the cheeses from their moulds and lightly salt the surface. This salting is primarily structural and microbial rather than purely for flavour. It regulates moisture movement, suppresses unwanted microbial growth, and creates a surface environment that favours the intended mould cultures during ripening.
6. Surface drying
Leave the cheeses uncovered in cool air for 30–60 minutes. This short drying phase stabilises the surface, prevents excess moisture accumulation, and improves mould attachment. The lightly dried surface encourages even rind development rather than patchy or aggressive growth.
7. Ripening
Transfer the cheeses to ripening mats and place them in a cool, humid environment at around 7–9°C. This can be a controlled fridge box with humidity, or a wine fridge with a bowl of water in the base for moisture. At this stage the cheeses become fully biologically active: lactic bacteria continue slow acidification, moulds begin surface colonisation, and enzymatic processes start breaking down fats and proteins, driving flavour and texture development.
8. Daily care
Flip the cheeses daily. This redistributes moisture, prevents pooling at the base, protects structure, and encourages even ripening. Without regular turning they will slump and destabilise as they age, but extreme care should be taken during the first week or so as the cheeses are extremely fragile at this stage.
9. Bloomy rind development (camembert-style)
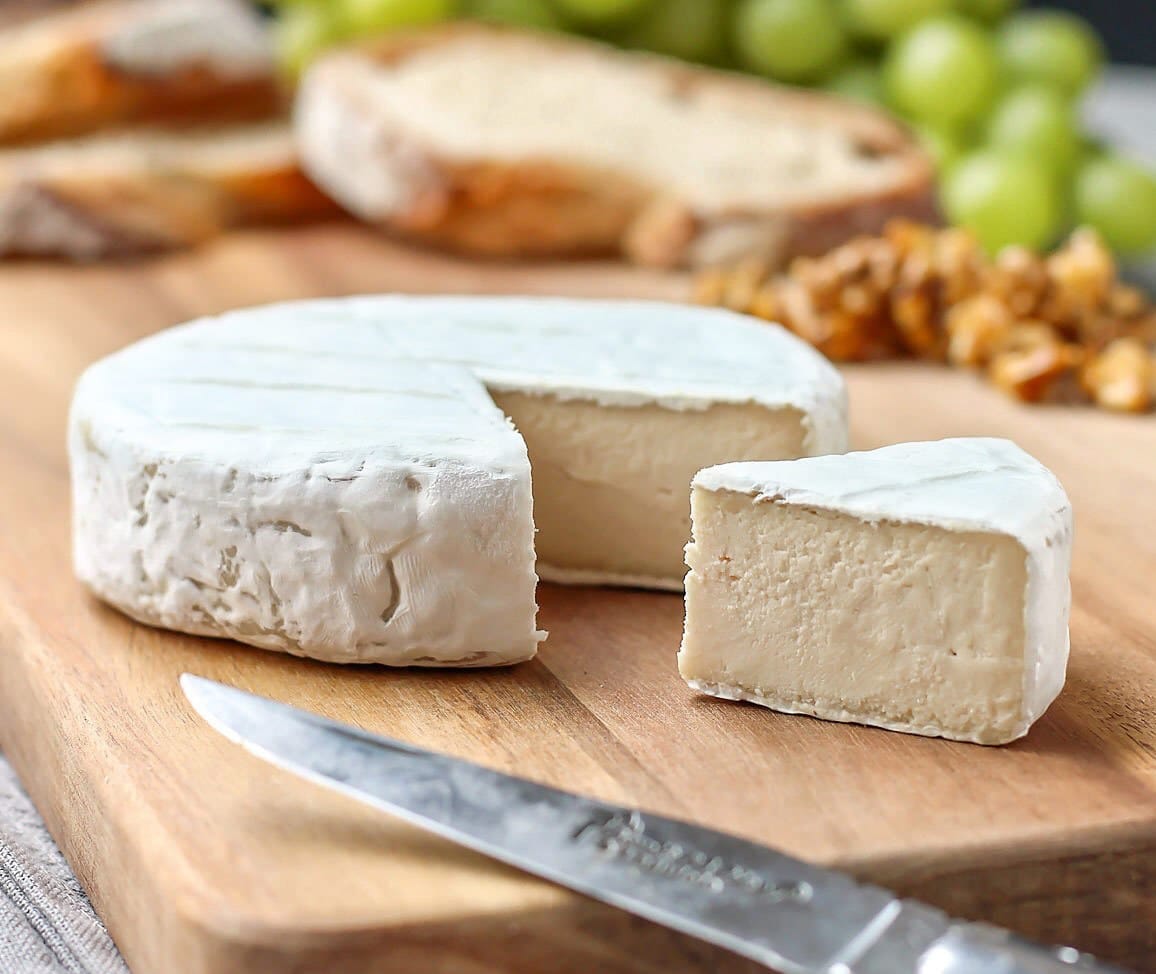
With Penicillium camemberti, white mould appears within a few days and gradually forms a full surface bloom. The rind drives internal softening as enzymes migrate inward, creating a creamy zone beneath the surface. These cheeses typically reach maturity in around 10–21 days, with peak texture and flavour at roughly two weeks.
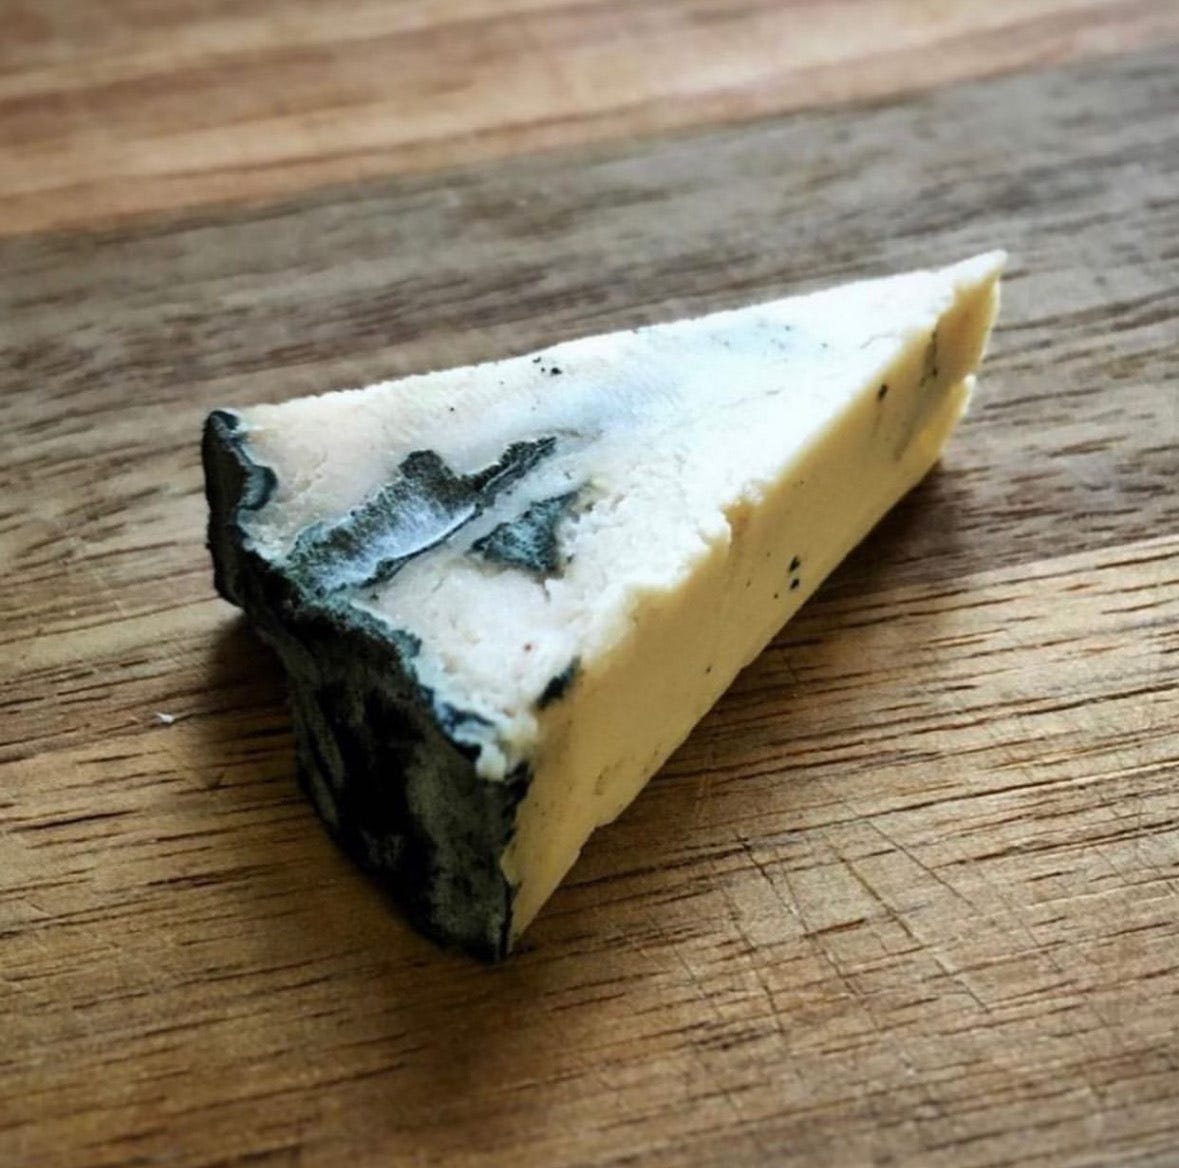
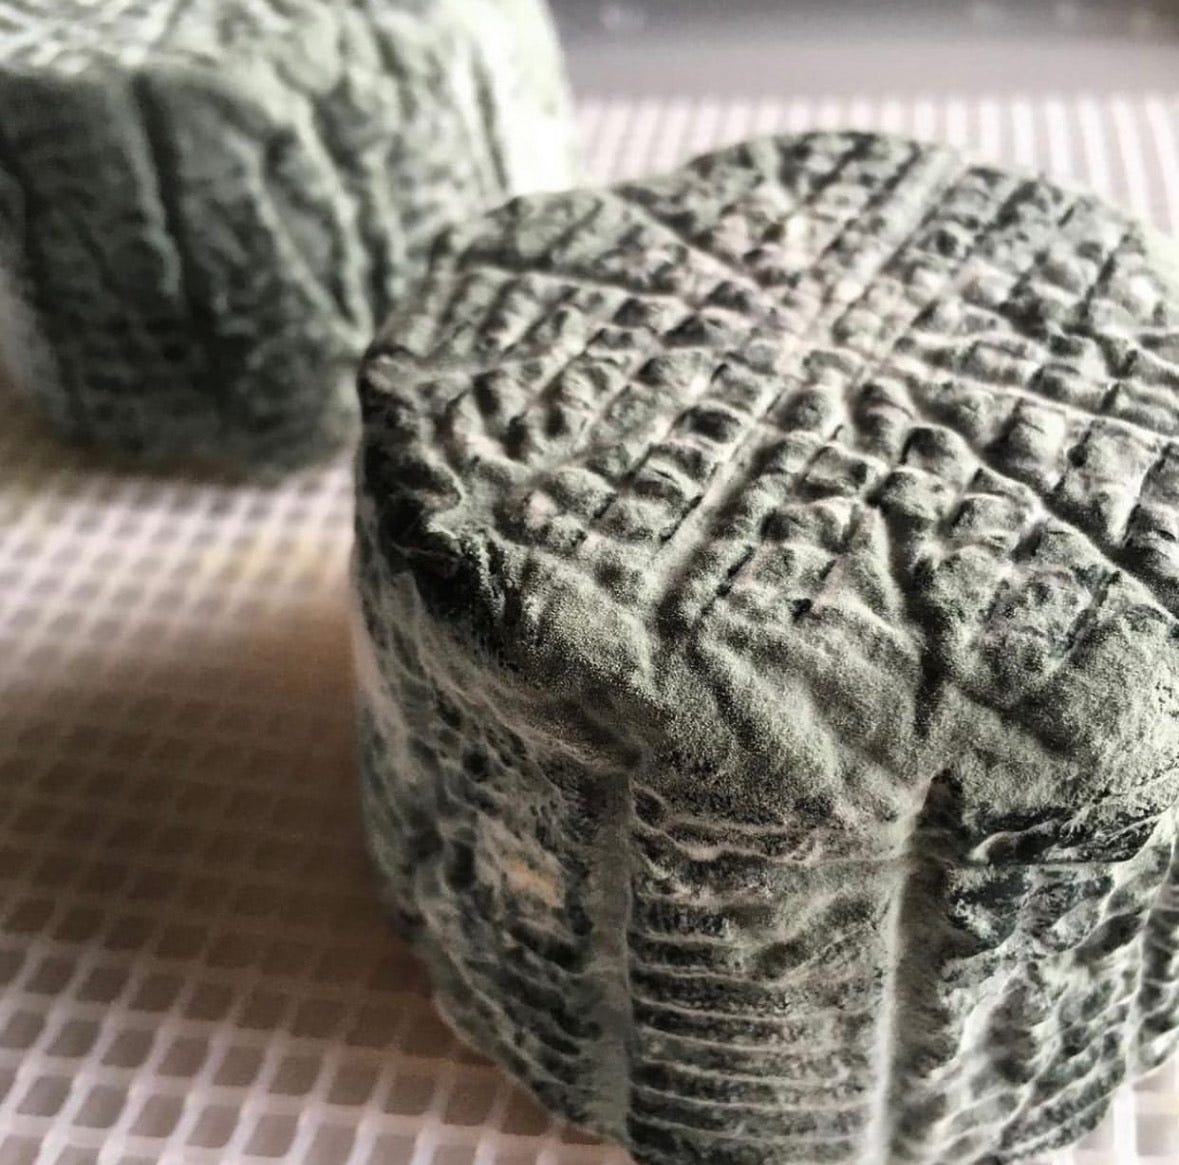
10. Blue development (roquefort-style)
With Penicillium roqueforti, allow the surface to stabilise for several days, then pierce the cheeses with a sterile skewer to create oxygen channels. This allows the mould to grow internally rather than remaining on the surface, forming blue veining and deeper flavour development. These cheeses typically mature over 2–4 weeks, with peak quality around the third to fourth week, and I’ve found the best results come from being quite dramatic with your skewering. Don’t be afraid to really go for it.
11. Storage
Once ripe, wrap loosely and store in the fridge. Nut cheeses peak quickly and decline quickly, and are best eaten within one to two weeks of full ripeness.
Additional notes
You can flavour the base by adding a small amount of crushed garlic and a pinch of smoked salt with the miso, or by rubbing the shaped cheeses with a vegetable ash salt before the rind blooms. Both work well, and both shift the character of the ferment without changing the underlying structure or process.
Troubleshooting
Hazelnuts emulsify extremely easily. This is great for the final texture of the cheese, but unforgiving during blending. The paste will often go claggy with a small amount of water and feel impossible to smooth without adding more, but once you do, you can’t take it back out again. If you cross that line, the water becomes fully bound in the emulsion and the paste will never drain or firm properly. Add water a tablespoon at a time, fully incorporate it, and only then decide whether you actually need more.
If the cheeses stick to the mats, slump, or fall apart during ageing, it almost always means there was too much water in the paste. Structure in nut cheeses comes from fat and density, not drainage, so once it’s loose, it stays loose. If your blender struggles with thick pastes, a pestle and mortar is slow but reliable, and gives you far more control over texture and hydration than high-speed blending.
One other thing worth watching is humidity. Too wet and the cheeses collapse; too dry and the rind struggles to establish. You’re aiming for moist air, not condensation. A light bloom is healthy, sweating, dripping, or pooling moisture isn’t. I often find that placing the cheeses inside a large lunch box (on their ripening mats) with a folded, damp piece of kitchen paper in the box to one side is enough to create the idea conditions in a fridge.
If the cheese smells sharply ammoniated, it has over-ripened. If the flavour is bitter, the culture load was too high or the cheese aged too long. Over-inoculation and over-ripening both produce harshness in nut ferments.
A word of warning regarding roqueforti, it travels. Not only will it happily jump to other nut ferments, overpowering the camemberti cultures, but it can find its way to homemade yoghurts and milk kefir. If you’re keeping it in a fridge you regularly use for other foods, best keep it isolated in it’s own box.
And finally, timing matters more than age. Nut cheeses don’t improve indefinitely. They ripen fast, peak fast, and decline fast. Eat them when they smell good, feel right, and still hold their shape. Waiting longer doesn’t mean better, it usually just means softer, sharper, and messier.
Closing Words
And that is how, over decade ago now, I cracked “nut cheeses” that actually taste good. I hope you’ve found this second part to the technique useful. And I apologise for the lack of photos compared to usual, but I had to dig through my archived images from a long time ago to find these.
If you have any questions regarding the technique feel free to ask them down below, or join the paid members chat where we share and troubleshoot techniques.
Share and restack this post whilst it’s free with whoever you think will enjoy it! And if you enjoyed it, check out the Recipe Index for The Black Butter Club here.
Thank you for joining me, and I hope you have a great week.
Sam

Just gorgeous, Sam! Thanks so much for doing this, and showing people that "cheeses" can be both full of beautiful flavor and dairy free. You put so much work, dedication, and passion into all of your posts, and it really shows. Thanks so much for everything you do.
Absolutely fascinating! I’m keen to give it a crack now, thank you Sam